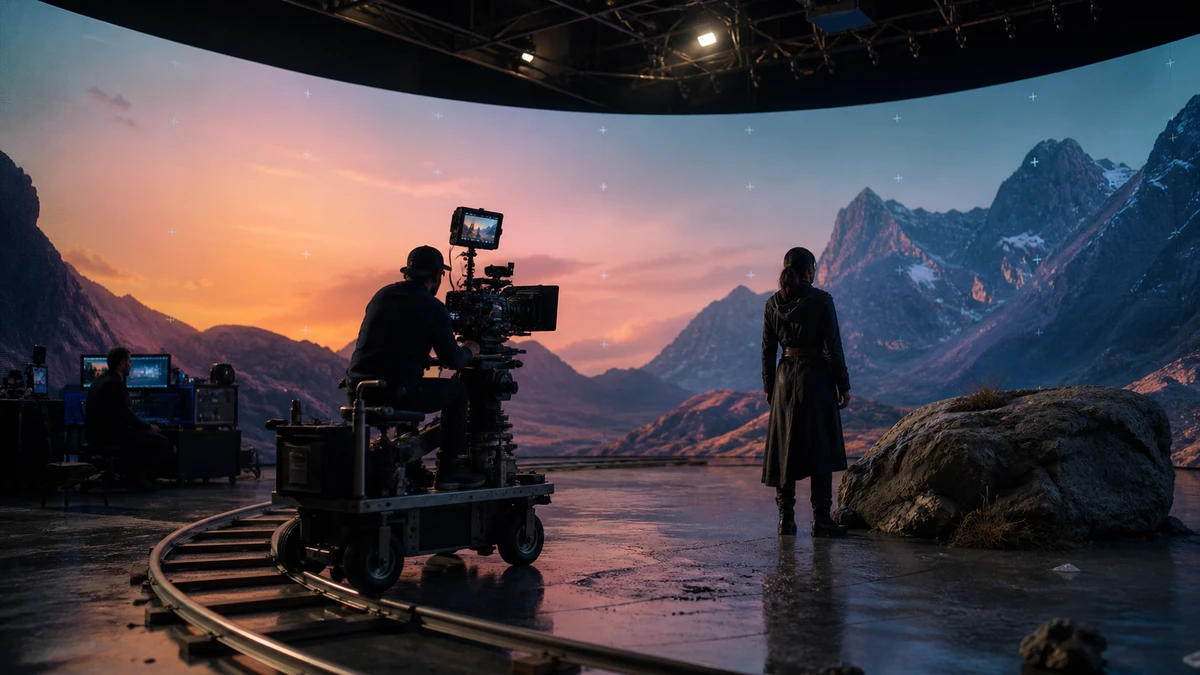
LED virtual production is often treated as a hardware question: how large a screen to buy, which engine to use, or how many machines are needed. What truly determines whether a shot works is whether a complete real-time system can seamlessly connect the camera, virtual environment, display hardware, and on-set crew. If treated merely as a video playback backdrop, production will quickly encounter issues like incorrect parallax, inaccurate reflections, image latency, or an inability to make adjustments on set. The following outlines a commercial project workflow, clarifying what must be completed before shooting and what requires on-set validation. ## Reverse-Engineer the Stage from Shot Design The first pre-production document should be a shot list. Each shot must specify camera movement, focal length range, actor and prop placement, elements requiring physical interaction, and whether the background needs significant parallax relative to camera motion. This step also separates practical sets from digital environments. Physical elements like window frames, tables, floors, and vehicle parts may require live-action filming, while distant buildings, skies, and extended spaces can be handled by the real-time engine. Delaying this boundary decision increases the risk of asset conflicts on set. Virtual environments must also be optimized for specific shot requirements. Assets that run smoothly on standard workstations may fail to maintain real-time frame rates in an LED studio. Epic’s virtual production documentation highlights both real-time performance and asset quality as pre-production priorities, indicating that art, technical art, and on-set teams should test together early rather than waiting until the wall is built. ## Synchronize the Virtual Camera with the Physical Camera Key visuals in LED virtual production originate from the camera's perspective. The system must track the physical camera’s position, orientation, and lens status in real time, delivering the corresponding virtual view to the LED wall. As the camera moves, the background must exhibit parallax consistent with physical space; otherwise, the image appears flat against the wall. Tracking data can be acquired via optical, feature-based, or inertial solutions, with interfaces like Live Link transmitting data to the engine. The physical and virtual cameras must also undergo position, lens, and distortion calibration. Any mismatch in focal length, lens distortion, camera height, or tracking latency will cause visible errors in ground planes, doorframe edges, and distant vanishing points. A comprehensive calibration test should be scheduled during pre-production. Execute actual push-pull, pan-tilt, or orbital movements intended for production while verifying reference stability within the virtual scene. Reviewing static frames in the editor cannot replace this test. ## Synchronize Multiple Screens in Real Time LED stages typically comprise multiple screens and rendering nodes. Systems like nDisplay distribute imagery based on spatial layout, requiring the master controller, render nodes, tracking system, and camera to share a stable network and time base. Timecode and genlock are on-set acceptance criteria, not post-production fixes. Independent device clocks can cause screen tearing, frame desynchronization, or misalignment between action and background. Before principal photography, record test footage of moving shots to verify alignment across playback, tracking, and recording systems. Optical issues also require practical testing. Pixel pitch, camera-to-screen distance, sensor size, and shooting angle all affect moiré patterns. Moiré is most pronounced when focus falls directly on the screen surface. Some shots mitigate this by focusing in front of or behind the screen, combined with lens and lighting adjustments. Final judgments must rely on test footage captured with the actual camera, lens, and LED modules. ## Ensure On-Set Capability for Scene Modifications LED virtual production shifts certain post-production tasks to the soundstage. On-site personnel are typically needed to manage master scenes and versioning, monitor render nodes and display status, handle camera tracking and calibration, and enable the production designer and DP to provide rapid feedback on materials, lighting, and composition. Collaboration tools allow artists, technical artists, and operators to work within the same scene simultaneously. This shortens iteration cycles, provided clear version control and rollback protocols exist. Every change must be traceable to specific shots and takes to prevent untracked on-set modifications. The LED wall itself contributes to lighting and reflections. While inner frustum content provides ambient light for actors, props, and reflective surfaces, screens cannot replace all lighting. Hard sunlight shadows, rim lights, and specific highlights may still require traditional fixtures or digital light cards. ## Maintain Fallback Options on Shoot Days Some shots achieve final pixel quality directly, while others require compositing due to ongoing background revisions, screen angles, or VFX needs. Current Unreal Engine workflows allow switching the inner frustum to green screen while maintaining the virtual environment in the outer frustum, preserving actor lighting and reflections while allowing background replacement in post. This fallback path must be tested on set, not decided after filming. Recordings should preserve camera tracking data, scene versions, lighting changes, and on-set references to support future compositing verification. ## Six Key Questions for Project Initiation - Which camera movements and reflection effects in these shots require on-set visualization? - Who is responsible for calibrating the physical camera, lens, and tracking system? - Have the LED modules been practically tested for moiré, viewing angle color shift, and brightness range? - Who maintains digital assets, versioning, and shot-specific scene modifications? - Which shots have green screen or post-production fallbacks in case of latency or rendering bottlenecks? - What tracking, scene, and color management data will be saved for each take? The advantage of LED virtual production lies in shortening the gap between on-set decisions and real-time imagery. Its barrier to entry stems from the same source: missing any element of pre-production preparation, technical synchronization, or on-set coordination makes problems more visible as screen size increases. Defining the shot list and testing protocols before determining stage scale usually aligns better with actual project needs than prioritizing screen pricing. ## References - Epic Games In-Camera VFX Overview https://dev.epicgames.com/documentation/unreal-engine/in-camera-vfx-overview-in-unreal-engine?lang=en-US - Epic Games In-Camera VFX Quick Start https://dev.epicgames.com/documentation/en-us/unreal-engine/in-camera-vfx-quick-start-for-unreal-engine