The Role of Video-to-3D Scene in Ad Previs
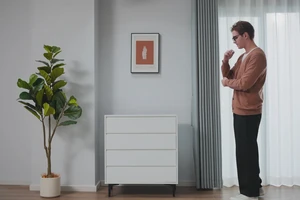
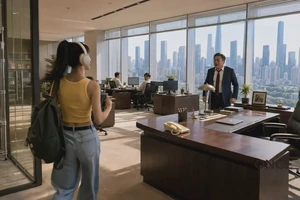
The Animation / Video to 3D Scene project type in Autodesk Flow Studio aligns a set of shots into a continuous 3D scene. This process preserves character and camera data, providing a foundational spatial reference for ad previs. Official guidelines recommend one continuous scene per project and require an establishing shot showing multiple characters and spatial relationships. This technique serves best as an editable previs starting point, helping teams confirm spatial logic before formal production.
Strict Input Video Requirements
Character assets must also be validated in advance. Official guidelines require USD support enabled for characters to receive skeletal animation; standard PBR materials and image textures ensure stable handoff conditions. Confirm that characters, environments, and cameras are all selected before exporting.
To ensure stable scene matching, input videos must meet specific criteria. Official guidelines recommend 30 fps and advise against fractional frame rates. Avoid crowded scenes and close-ups framed above the chest. These limitations stem from the algorithm's need to calculate depth information and motion trajectories. Non-compliant footage may cause scene fragmentation or character position drift. Therefore, strictly control composition and frame rate during shooting to reduce post-production correction costs.
Applicable Conditions and Acceptance Methods
During the ad previsualization phase, first select two to three consecutive shots with clear spatial relationships for review. Acceptance focuses on shot alignment and the continuity of characters entering and exiting the frame. For product interaction shots, separately verify hand movements, occlusion, character scale, and camera motion. Do not evaluate individual composites in isolation; instead, focus on spatial consistency across multiple shots. Auto-generated scenes can serve as a foundation for adjusting lighting, cameras, and character animation in traditional DCC software, but the original video, character versions, and exported assets must be retained for manual correction.
- Check that spatial alignment across consecutive shots is smooth, without jumps or misalignment.
- Verify that character scale and position remain consistent across different shots.
- Confirm that export settings are configured for either a full 3D scene or individual elements to meet downstream workflow requirements.
Unknown Factors and Performance Boundaries
Specific results and processing times depend on various factors, including character asset complexity, visual detail level, platform version differences, and processing quota limits. As no unified standards currently exist, these variables may affect final output quality. Therefore, allocate sufficient time for testing and adjustment in actual projects. Note also that this technology is still evolving, and some complex scenes may require additional manual intervention to achieve desired results.