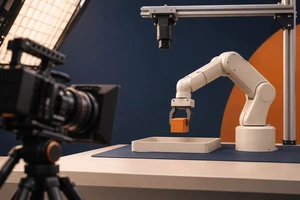
In an installation video, the part slides into place. The viewer pauses when it is their turn: the connector points left on screen, but right on the product in front of them. The step may be simple; the missing piece is a clear transition between the camera's view and the user's working position.
A product installation video must explain both what happens next and which side of the object on screen corresponds to the one in the user's hands. This fictional desktop stand illustrates ways to establish orientation through camera position, action and editing. The actual product instructions and engineering team's confirmed sequence remain authoritative.
Find a reference that stays visible
Imagine a stand base with a round hole and a distinctive cable channel on one side. Before filming, establish that the channel faces the operator and the hole appears on the right. Choose a feature the customer can actually identify, not a temporary mark that disappears from the finished video.
Begin with a wide enough view to establish the base, channel and hands; then move closer to the hole. The channel gives the viewer a way to identify the product's orientation in the close-up. If a different product version changes the construction, check both pictures and wording against that version.
Overhead and face-to-face views ask different things
Filming from behind or above the operator often makes the direction of the hands easier to relate to the viewer's own movements. A face-to-face view can show expression and the front of the product, but creates a different left-to-right relationship with the viewer's workspace. Neither angle is inherently better; the key is not to assume the viewer will automatically translate between them.
For example, before cutting from a person facing camera to a close-up of the connection, retain the action of turning the base toward themselves. Alternatively, show the base and cable channel in the new angle before the hand enters. If the opposite side must be shown, let the audience see how far the product turns instead of jumping straight to a reversed close-up. Avoid flipping footage horizontally to fix direction: lettering, threads and asymmetrical details flip too.
Connect camera angles with a real movement
When the hand hides a hole, an oblique close-up may be clearer than a view directly overhead. Record the complete action first, then a clean view of the opening. In the edit, let both angles share a recognizable action: a hand steadying the base, the stand turning, or a part first touching the opening. That moment gives the audience time to reorient; the close-up becomes more than an attractive detail.
If an action can only be performed once, or safe operation does not permit repeated disassembly, agree on suitable samples and a reset method with the engineering team. The camera position can change for clarity, but the real sequence, force and product state should remain accurate.
Show alignment and completion as separate states
Before a screw enters a hole, viewers need to see which end points down and where the hole is. After tightening it, they need to recognize what completion looks like. Hold a stable view of the connection, let the hand complete the action, then briefly show the joint, marking or other genuine feedback. If completion is audible only, consider a visual indication the product genuinely supports; do not invent a click or lock signal.
A very tight close-up can lose the surrounding structure; a wide shot can hide a small hole. Establish the object in a medium close view, then check the detail shot at the intended screen size. Review focus and hand obstruction together in a test rather than relying on enlargement in post.
Ask someone unfamiliar with the project to follow along
Give a test edit and the same product version to someone who has not seen the storyboard. Let them pause and work through the sequence. Watch whether they first rotate the product, repeatedly search for a reference or lose track of front and back at a particular cut. Ask what they saw, then revise that transition. A small preview can reveal comprehension problems; it cannot prove that everyone will finish the installation.
An installation tutorial and a brand film can serve different purposes: the former preserves actionable orientation and completion states, while the latter may convey the overall experience more concisely. Explore ONCE video production insights for related approaches.
If you are planning an installation or first-use video for customers in overseas markets, contact ONCE to discuss the sample, user journey and camera perspectives.