During project initiation, first clarify which communication problem the texture and depth must solve.
Texture and depth in product close-ups must serve brand communication goals. During initiation, the brand must answer a specific question: which core selling point should viewers remember within seconds of watching this TVC? For example, in the Tiger Beer case, close-ups emphasizing liquid flow and bottle sheen essentially convey sensory associations of freshness and coolness. However, different products require different textural focuses: skincare highlights hydration and radiance; electronics emphasize metallic edges and screen reflections; food showcases surface texture and juiciness. The brand should clearly specify in the creative brief the target audience, viewing context (mobile portrait or TV landscape), typical competitor close-up styles, and the differentiated perception this film aims to establish. Based on this information, the production team must determine whether texture and depth rely on practical lighting, macro lenses, CGI enhancement, or AIGC generation, and propose a preliminary technical plan. If the brand only requests a premium look, the production team must ask for specific references; otherwise, serious disagreements over quality standards will arise during final acceptance.
Breaking down the components of texture and depth is essential to developing an actionable plan.
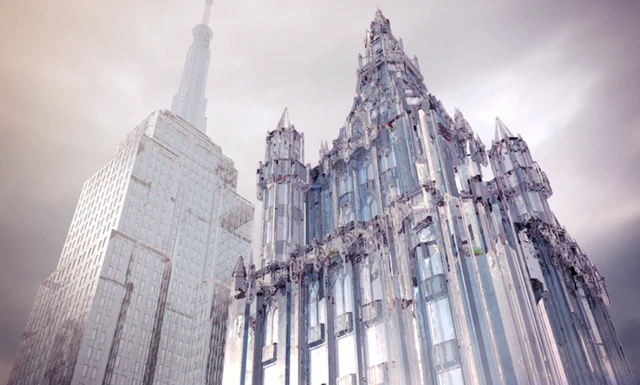
Textural depth is created by layering multiple visual dimensions, including surface reflections, internal translucency, edge definition, depth-of-field transitions, dynamic details, and color grading. Brands must understand these dimensions to communicate effectively with the production team using a shared vocabulary. Surface reflection refers to highlight shape and sharpness; matte products require soft, diffused light, while glossy products need hard light to create distinct catchlights. Internal translucency, common in liquids, glass, or semi-transparent materials, requires backlighting or rim lighting to allow light to pass through. Edge definition determines product separation from the background; bright edges against dark backgrounds or dark edges against bright backgrounds both enhance three-dimensionality. Depth-of-field transitions control the blur range before and after the focal point; shallow depth of field highlights specific details, while deep focus displays the entire product. Dynamic details include liquid splashes, rising bubbles, drifting smoke, or surface textures, all of which add realism and emotional impact. Color grading influences overall tone; cool tones suggest technology, while warm tones convey approachability. During storyboarding, the production team should list the textural dimensions to emphasize in each close-up and specify corresponding lighting, lens choices, props, and post-production techniques. When reviewing storyboards, brands should verify that each shot supports a clear selling point rather than pursuing complexity for its own sake.
Pre-production preparation determines the maximum achievable quality of close-up textures.
Brands must provide physical products, packaging design source files, material specifications, usage scenario references, and competitor close-up clips. At least three product units are required: one for lighting tests, one for principal photography, and one as backup, as close-up shooting easily leaves fingerprints or scratches on surfaces. Material specifications must detail surface finishes such as matte, glossy, brushed, or coated, as these directly affect lighting angle selection. Usage scenario references help the production team understand the product in real environments, such as condensation patterns on beverage bottles or screen reflections under outdoor lighting. Competitor close-up clips serve as texture benchmarks but should be analyzed for lighting setups and color grading approaches rather than copied directly. The production team should also conduct a technical site survey to confirm power capacity, ceiling height, ambient light control, and the need for haze machines or high-speed cameras. If the product requires dynamic action like pouring, rotating, or opening, the brand must provide operating instructions and assign knowledgeable personnel to supervise on set, preventing uncontrolled footage caused by improvisation.
Lighting setup is the primary control point for textural depth in close-ups.
Textural depth in product close-ups is primarily shaped by lighting, not fixed in post-production. A basic lighting setup typically includes key light, fill light, rim light, and background light. The key light determines highlight and shadow distribution; side positioning emphasizes texture, while frontal positioning flattens it. Fill light controls shadow density; weaker fill increases contrast and creates a harder texture. Rim light illuminates from behind or side-behind to create edge highlights that separate the product from the background. Background light establishes atmosphere and can use gels or gobos to add depth. Transparent or translucent products require bottom or back lighting to transmit light through the material for clarity. Use softboxes, reflectors, honeycomb grids, or flags during shooting to precisely control light quality and spread. The production team should use light meters or monitors to check for blown highlights or crushed shadows in real time, capturing test frames to confirm textural direction. On set, brands should ensure lighting aligns with product selling points; products emphasizing purity should minimize extraneous reflections, while those emphasizing power should enhance contrast. If on-set lighting is inadequate, do not rely on post-production color grading for correction, as blown highlights and shadow noise are often irrecoverable once recorded.
Lens selection and camera movement determine the narrative pacing of close-up shots.
Close-up shots guide viewer attention through focal length, aperture, angle, and camera movement. Macro lenses capture details invisible to the naked eye but have extremely shallow depth of field requiring precise focus. Tilt-shift lenses alter the focal plane angle, ideal for maintaining parallel alignment between product surfaces and packaging. Telephoto lenses compress space, suitable for layering product and background elements. Wide-angle lenses create perspective distortion when close, emphasizing volume but requiring caution regarding edge distortion. Aperture size controls depth of field; wide apertures keep focus sharp while blurring backgrounds, while narrow apertures maintain overall product clarity at the cost of increased background detail. Shooting angles include eye-level, top-down, low-angle, and Dutch angle; eye-level appears objective, top-down showcases structure, low-angle enhances presence, and Dutch angles add dynamism. Camera movements include push-in, pull-out, dolly, orbit, and tracking; push-ins emphasize detail, pull-outs reveal context, and orbits enhance three-dimensionality. Storyboards must specify focal length, aperture, camera height, and movement path for each shot, along with estimated duration. Brands should confirm these designs match script pacing; fast-paced products suit quick lateral moves, while slow-paced products benefit from gradual push-ins. For hand-product interactions, consider focus-pulling difficulty and use manual follow focus or wireless systems if necessary.
Balancing layered color grading and detail enhancement in post-production.
Post-production focuses on layered processing for each close-up shot. First, arrange clips sequentially in editing software to ensure continuous action and script-compliant pacing. Next, perform primary color grading to correct white balance, exposure, and contrast for visual consistency across all shots. Then apply secondary color grading, adjusting hue, saturation, and luminance separately for product surfaces, highlights, and shadows. For example, warm up bottle highlights and desaturate backgrounds to make the product stand out. Detail enhancement includes sharpening edges, boosting micro-contrast, and removing dust or blemishes, avoiding over-sharpening that introduces visible noise. Slow motion or freeze frames can highlight liquid splashes or bubble movement, provided source footage has sufficient frame rate. If practical footage lacks required texture, supplement with CGI or AIGC elements like fluid trails, modified reflections, or composited smoke. However, synthetic elements must match practical lighting direction to avoid appearing artificial. During post-production review, brands should verify each close-up meets established textural goals and document specific revision notes, such as shifted highlights, overly cool backgrounds, or excessively sharp edges. Feedback must reference specific shot numbers and timecodes to avoid ambiguity.
Acceptance checklists must cover every deliverable aspect from visuals to audio.
Commercial video project acceptance should not rely solely on the final cut; intermediate files and master specifications must also be reviewed. Brands should require production teams to provide editing project files, color-graded versions, raw footage, audio stems, subtitle files, and delivery masters. Editing project files facilitate future revisions, color-graded versions enable platform adaptation, raw footage supports re-editing, audio stems allow mixing adjustments, and subtitle files are used for multilingual versions. During acceptance, inspect visuals frame-by-frame for flickering, noise, banding, or focus errors; check audio for hiss, distortion, or inconsistent volume; and verify that subtitles are synchronized and typo-free. Platform specifications must follow the latest official pre-release requirements; since social media platforms impose varying limits on resolution, bitrate, frame rate, and duration, brands should confirm these in advance and request corresponding deliverables. Copyright scope must be confirmed in writing, covering music licensing, talent likeness rights, location permits, and stock asset rights to avoid legal risks. After acceptance, brands should retain all delivered files for at least one year for campaign analysis or future revisions.
Applicable boundaries and unsuitable scenarios must be identified in advance.
Textural close-ups are not suitable for every TVC. If a product lacks visual detail, such as plain cardboard boxes or basic T-shirts, excessive close-ups may highlight cheap materials. If communication goals emphasize function over aesthetics, such as stain removal, close-ups should focus on usage results rather than the product itself. Limited budgets may preclude high-speed photography, macro lenses, or complex CGI; in such cases, simplify with static close-ups against clean backgrounds. If the product is not finalized and only design renderings or 3D models exist, live-action shooting is impossible, necessitating CGI or AIGC, provided rendering quality meets textural standards. Extremely short schedules, such as two-day shoots, are unsuitable for liquid splashes or smoke effects requiring extensive setup. Brands must assess these constraints during project initiation to prevent costly mid-production changes. Production teams must also identify unsuitable scenarios during proposals rather than making blind commitments to secure work. Both parties should define change management processes and additional fee terms in the contract to keep the project within manageable bounds.
The next step is to validate the textural direction using a minimum viable clip.
Before principal photography, brands and production teams should create a three-to-five-second product close-up test clip covering key lighting and lens setups. This test need not include full sets; it focuses solely on the product to validate whether the textural direction meets expectations. Both parties evaluate the results jointly: proceed to principal photography if standards are met, or adjust lighting and lens plans if not. This approach costs far less than reshooting after full production and gives brands concrete expectations of final texture. Test clips can also support internal reviews, helping stakeholders reach consensus quickly. Completing testing before advancing to full storyboards, shoot schedules, and post-production timelines significantly reduces project risk.
If you are preparing a TVC project, first compile your brief, visual references, product or corporate materials, delivery platforms, and copyright scope before reviewing theTVC Service Pageto translate abstract preferences into actionable production parameters.