VFX pre-vis is the first gate in TVC commercial project initiation.
When a TVC commercial script features a rolling vehicle, product transformation, environment replacement, or digital double, brands often first see the stunning visuals in reference clips, then ask the production team if it can be achieved. If production goes straight into principal photography, the post-production phase may face issues like unmatchable shots, budget overruns, or substandard delivery. A VFX pre-vis is a short clip used before principal photography to verify the feasibility of key shots at the lowest cost, usually lasting only a few seconds to a dozen seconds, but it must include real lighting, materials, and motion rhythm. It is not a concept art, nor a dynamic storyboard, but a test clip with the prototype of the final visual quality.
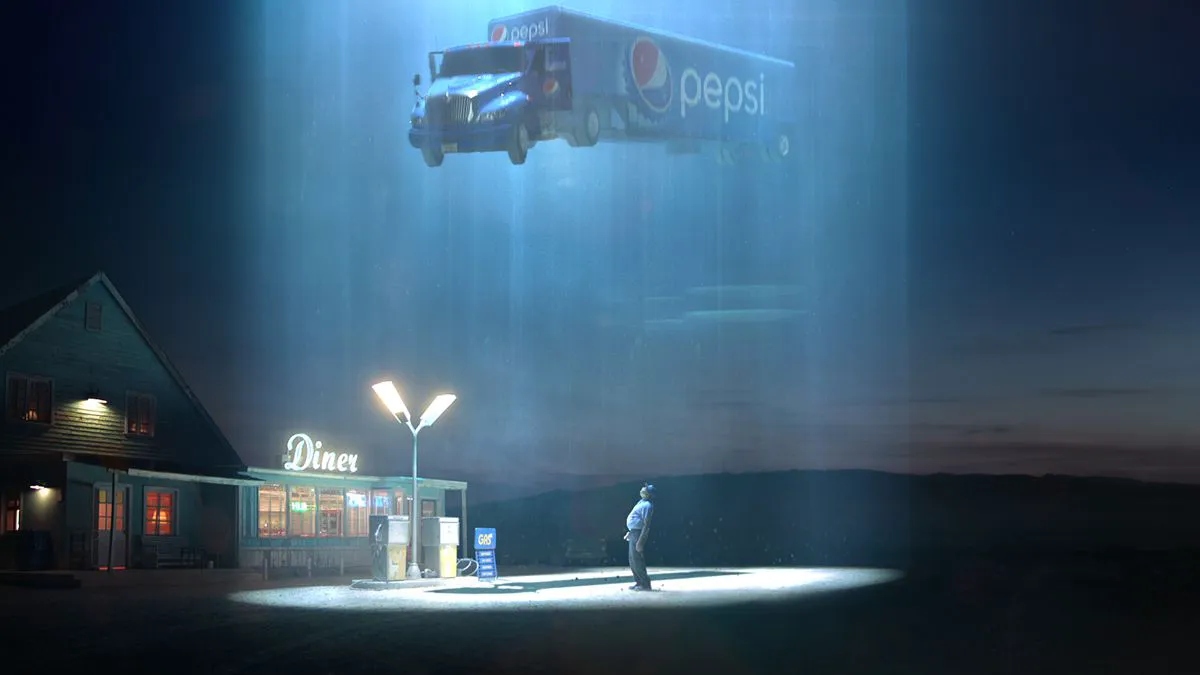
During project initiation, the brand and production team must jointly determine which shots require a pre-vis. The criteria are whether the shot meets one of three conditions: involves physical simulation, involves a character or product digital double, or involves seamless compositing of live-action and CG elements. For example, a car falling from a height and rolling in a commercial—the physical simulation results are affected by gravity, ground friction, and body material, making it hard to judge final credibility without a pre-vis. Another criterion is whether the shot carries the core selling point; if this shot fails, the entire TVC commercial's message falls apart, so the pre-vis has the highest priority. If the shot is just background decoration or a brief transition that can be fixed in post or by changing the camera angle, there's no need to spend pre-vis budget.
The risk is that creating a pre-visualization may consume time and money, but compared to rework after the official shoot, the pre-visualization investment usually accounts for only a small fraction of the VFX shot's total budget. Brands should avoid two extremes: one is requiring all shots to have pre-visualization, leading to excessive pre-production costs; the other is trusting the effect based solely on reference videos, ignoring differences in their own product's materials and lighting environment. The production team needs to clarify acceptance criteria before starting the pre-visualization, including resolution, frame rate, color space, compositing layers, and output format, as these parameters directly affect the match with subsequent live-action footage.
What materials must the brand prepare before pre-visualization?
Before starting the pre-visualization, the brand needs to provide a high-precision model or scan data of the product, including the product's appearance, material textures, dimensional proportions, and internal structure. If the product is not yet in mass production, there must at least be CAD drawings or three-view drawings, otherwise the production team cannot build a credible digital model. Secondly, reference footage must be provided, including competitor ads, movie clips, or VFX demo videos, but reference footage is only used to communicate style and effect direction and cannot serve as acceptance criteria, because lighting, camera, and product form vary greatly across different projects.
Shooting conditions must also be clarified, including the planned camera model, lens focal length, shooting location, lighting plan, and exposure settings for the live-action footage. This information determines whether the lighting environment and depth of field in the pre-visualization match the live-action shoot. If the shooting location has special reflective objects or ambient light, environmental reference photos or HDR panoramas need to be shot in advance for the VFX team to match reflections and shadows. The brand should also provide high-definition photos of the product from different angles; especially when the surface material has brushed, matte, leather, or transparent components, the photos must reflect true reflective characteristics.
Core actions for the production team to confirm include: parsing the start and end frames, motion trajectory, and duration of VFX shots in the script, building a shot timeline, and marking the handoff points between live-action and CG parts. At the same time, the output specs for the pre-visualization must be determined, generally matching the final cut, but resolution can be lowered to save time, provided color and compositing relationships remain unchanged. The brand must review the pre-visualization production plan, clarifying the person in charge and delivery time for each stage, to avoid indefinite delays in pre-visualization production.
An exception is if the product is pure 2D design or a packaging box and does not require complex models, the pre-visualization can be simplified. However, if the product has liquid, smoke, cloth, or flexible materials, material samples or physical property descriptions must be provided, otherwise the simulation results may be distorted. The brand must also pay attention to copyright issues; music, fonts, and character portraits in reference footage cannot be directly used in the pre-visualization unless authorized, otherwise the pre-visualization can only be used for internal communication and cannot be shown externally.
Pre-visualization validates compositing logic, not final render quality.
The pre-visualization for TVC commercial VFX focuses on validating three things: first, the motion match between live-action footage and CG elements; second, the consistency of lighting direction and color; third, the credibility of physical simulations. When reviewing the pre-visualization, the brand should not just look at whether the image is beautiful, but whether there are goofs during camera movement, such as flickering product edges, jittery shadows, or misaligned reflections. Render precision in the pre-visualization can be lowered, but motion laws and spatial relationships must be correct.
During the pre-visualization stage, the production team must use the same camera parameters as the official shoot, including focal length, aperture, shutter angle, and sensor size, as these parameters affect depth of field and motion blur. If live-action footage is not yet available, a virtual camera in the 3D scene can be used to simulate motion, but it must be consistent with the director's storyboard. The pre-visualization should include a simple grayscale or wireframe version to check occlusion relationships and motion trajectories between objects; this makes it easier to spot problems than just looking at the final effect.
The brand must participate in the pre-visualization review and provide clear feedback, such as whether the product's rotation speed is too fast, whether the material reflection is too strong, or whether the shadow is too heavy. Feedback must be specific to frame numbers and positions, not just saying it feels wrong. The production team adjusts the model, materials, lighting, or animation curves based on the feedback, then outputs a second version of the pre-visualization. Usually, the final plan can be determined after two to three rounds of pre-visualization iterations; if it still falls short of expectations after more than five rounds, the shot design or shooting plan needs to be re-evaluated.
The risk is that the test footage and the final shot differ in resolution, frame rate, and color depth, resulting in loss of detail or color shifts during post-production compositing. Therefore, the final delivery specs must be determined during the test production, and the color management workflow between the camera and VFX team must be tested before shooting. If the test looks great but the actual footage is underexposed or out of focus, post-production cannot fix it, so the technical requirements and checklist for shooting must be clarified at the test stage.
How to reserve data for VFX tests during the shooting phase
When shooting a TVC, VFX shots require additional data collection, including HDR environment light maps, gray balls and color charts, lens distortion grids, and dimensional measurements of movable objects in the scene. This data is used in post-production to match the lighting and perspective of CG elements. Before rolling on each VFX shot, the camera team must first capture reference footage with a gray ball and color chart, then capture ambient light reference, and finally shoot the actual performance. This order cannot be reversed, because once the actor or product moves, the ambient light may be blocked.
Camera motion data must also be recorded, including pan/tilt angles, focal length changes, focus position, and shutter speed. If using a motion control system or robotic arm, the motion path file must be saved. If shooting handheld, tracking markers must be placed in the frame, avoiding the actor's face and key product areas, and kept small enough for easy removal in post. A dedicated person on set should record the metadata for each shot, including shot number, time of shooting, lighting setup, and special notes; this information is critical during post-production compositing.
The brand should confirm whether the camera team has VFX shooting experience, such as using high-speed cameras, understanding green screen lighting requirements, and handling reflective objects. If they lack experience, a technical test is recommended before the actual shoot: shoot a few seconds of footage with the real product in the intended scene and hand it to the VFX team to verify the data is usable. This test can be done concurrently with test production to avoid discovering issues on the shoot day.
An exception is if the VFX shot is entirely generated in a 3D environment and requires no live-action footage; in that case, the shooting phase only needs to capture environment reference and lighting data. However, most TVCs include live-action product footage, especially product close-ups, which require the product's reflection and texture under real lighting. If the product is transparent or translucent, a polarizing filter or specialized lighting must be used during shooting to reduce unwanted reflections while preserving necessary transmission effects.
How a test evolves into a final shot during post-production
When post-production begins, the team imports the 3D scenes, materials, and animations from the test into the final project, replacing them with high-precision models and high-quality textures, and re-renders at the final resolution. This process focuses on recalculating lighting and details, so sufficient render time must be reserved. The brand should understand that the test may use proxy models or simplified materials, while the final shot uses the final models, which can increase render times several-fold.
During the compositing phase, the VFX team composites the live-action footage with CG render layers, including color correction, edge blending, depth-of-field matching, and motion blur matching. The brand should check whether the composited shot matches the noise level of the live-action footage; if the live-action footage has grain, the CG elements must have matching grain added, or they will look out of place. Also check that the product shadows align with the live-action shadows and that reflections contain real objects from the scene.
During post-production, issues not found in the test may surface, such as materials flickering at certain angles or simulated fluids becoming unstable over long durations. Therefore, the production team should establish a shot review mechanism, outputting previews for brand approval at the end of each stage rather than delivering everything at once at the end. The brand should designate a single decision-maker to avoid rework caused by inconsistent feedback from multiple people.
The delivery consequence is that if unverified details in the sample are found during the post-production stage, such as product surface scratches or label positions, the model or materials need to be readjusted, which will affect the schedule. Therefore, the sample stage should include as many visible product details as possible, including brand logos, buttons, seams, and wear. The brand should provide the physical product or high-definition photos to ensure accurate model details.
When accepting VFX shots, what specific items should the brand check?
When accepting TVC commercial VFX shots, the brand should establish a checklist and verify item by item. The first item is motion matching, i.e., whether the motion trajectories of CG elements and live-action footage are synchronized, which can be checked frame by frame for sliding or drifting. The second item is color matching, including whether brightness, contrast, saturation, and hue are consistent, which can be compared using a scope or the naked eye. The third item is shadows and reflections, checking whether the shadow direction, softness, and reflection content are reasonable.
The fourth item is material texture, whether the product surface presents realistic reflection, roughness, transparency, and refraction effects, especially for metal, glass, leather, and plastic. The fifth item is edge blending, whether the seams between CG elements and live-action backgrounds have no hard edges, no halos, and no color banding. The sixth item is motion blur, whether CG elements in high-speed motion shots have the same blur amount and direction as live-action footage. The seventh item is depth of field, whether CG elements are consistent with the focus position of live-action footage, and whether the foreground and background blur is natural.
The brand should also check the delivery format, including resolution, frame rate, encoding, color space, and audio specifications, which must meet the publishing platform's requirements. At the same time, confirm whether source files are delivered, including 3D scene files, compositing project files, render layers, and raw footage, which are used for subsequent modifications or secondary production. During acceptance, also check whether subtitles, logos, and copyright information are complete, especially whether the brand elements appearing in VFX shots are accurate.
The risk is that the brand only checks the final cut and ignores intermediate versions, causing problems to be exposed only at the final stage. Therefore, it is recommended to conduct phased acceptance during the post-production process, for example, confirming materials after models pass, confirming animation after materials pass, confirming rendering after animation passes, and finally confirming compositing. Each stage should have written records to avoid later disputes.
Which TVC commercial projects are not suitable for VFX samples?
Not all TVC commercials require VFX samples. If the VFX shots are simple subtitle animations, color adjustments, or minor touch-ups, you can proceed directly to post-production. If the project cycle is extremely short, such as only one week, sample production may encroach on formal production time; in this case, priority should be given to core shots, and other shots should be simplified. If the project budget is very limited, the sample cost may exceed the VFX shots themselves, so live-action stunts or post-production retouching can be used as alternatives.
Additionally, if the VFX shots are purely stylized effects, such as cartoon style, abstract graphics, or hand-drawn animation, which do not require physical simulation, the necessity of a sample is reduced. If the director and production team have extensive experience and the shot plan has been verified multiple times, the sample can also be skipped, provided the brand accepts the risk. Another situation is when the product itself is virtual, such as a digital product demo, where all content is generated in 3D; the sample can directly serve as part of the final shot without additional production.
To determine whether a sample is worth the investment, the brand can calculate the ratio of sample cost to potential rework cost. If the rework cost may exceed three times the sample cost, then the sample is necessary. If the rework cost is controllable, for example, it can be avoided by changing shots or adjusting the script, then the sample can be omitted. The production team should honestly inform the brand of the risk level of each VFX shot, rather than recommending a sample just to showcase technology.
The exception is, if the VFX shot involves a digital double or face replacement, a proof of concept is almost always necessary, because the human eye is highly sensitive to human form, and the slightest unreality will trigger the uncanny valley effect. Such proofs need to include the real actor's performance and facial capture data, and the verification cost is high, but the risk of failure is also extremely high. Brands should reserve sufficient time and budget for this.
Next step suggestion: start with one proof shot to validate the process.
When preparing a TVC commercial project, it is recommended that the brand and the production team first select the highest-risk VFX shot and produce a proof to validate the entire process, including asset preparation, shooting data capture, post compositing, and acceptance criteria. This proof does not need to be perfect, but it must be able to expose problems. Through this proof, the brand can understand the production team's technical capabilities and communication efficiency, while establishing reasonable expectations for the final cut. After the proof passes, gradually expand to other shots to avoid investing too many resources at once. Remember, the core purpose of a proof is to reduce uncertainty, not to showcase the final result.
If you are preparing a TVC commercial project, you can first organize the brief, reference visuals, product or corporate materials, delivery platforms, and copyright scope, then checkthe TVC commercial service pageto ground communication from abstract preferences to executable production boundaries.