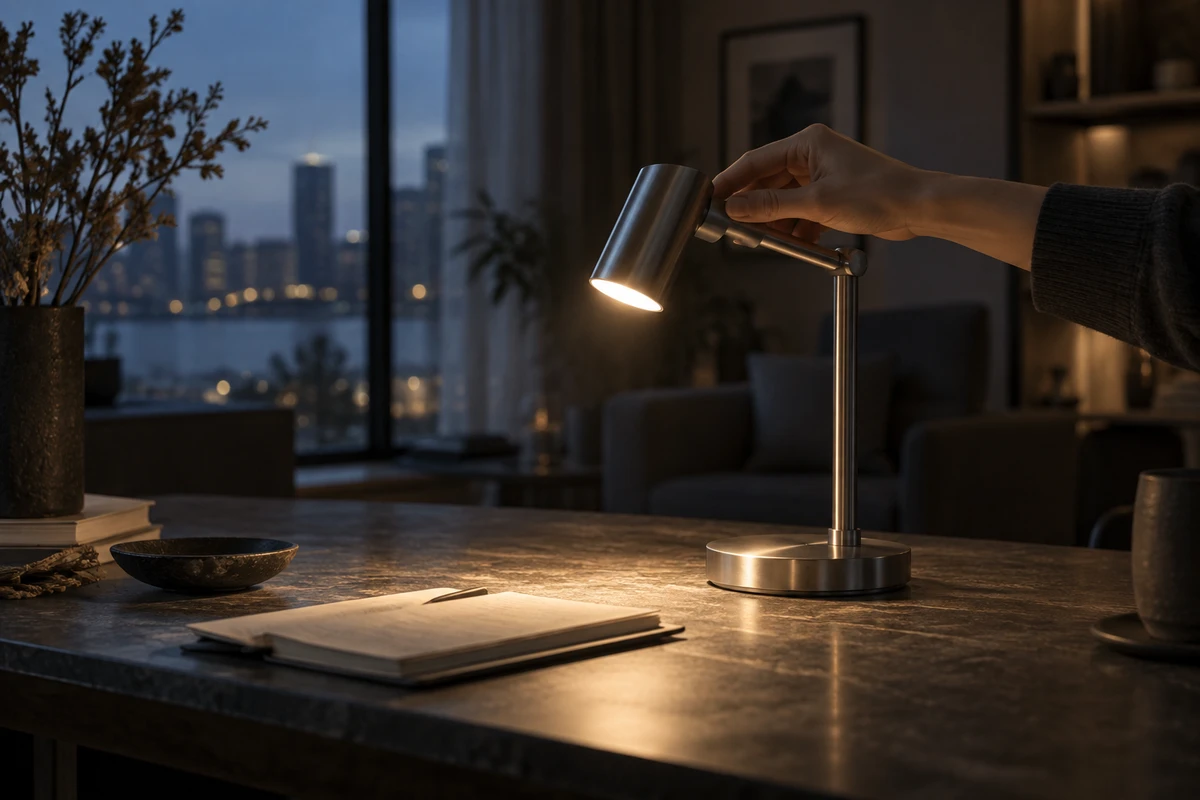
Imagine a desk lamp in a night interior. Good lamp commercial lighting has to preserve more than the glow. Raising overall exposure may turn the shade into a white patch; lowering it to protect the emitter can bury the arm, tabletop spill and view outside the window. This article uses an imagined scene. The cover is AI-generated concept art, not a real model, lighting test or finished frame.
One shot has to show where the light comes from, what the fixture looks like, where the light falls and what surrounds it. Review those four layers separately, then judge their hierarchy in the final composition.
Start with the frame’s priority
All four layers should be legible, but they do not need equal brightness or visual weight. Agree on the shot’s main message before filming. If the selling point is the quality of light through the shade, the emitter and tabletop spill may lead. If the form or material is the hero, establish the arm and base first and let the glow support them. The window should place the scene at night without pulling attention from the fixture.
A hero shot does not need to carry every product detail. Give construction details their own close-up; a frame asked to communicate too much often leaves nothing clearly understood.
Check the image in four layers
- The emitting surface: The lit area should have a readable shape, while the shade edge and opening remain identifiable. If the highlight becomes a featureless white patch, check the lamp’s angle to camera, exposure and the practical’s brightness together. Raising the whole image is rarely the only adjustment.
- The fixture: Matte and chrome surfaces read differently. Chrome behaves like a mirror, so the curve of an arm appears through the shapes it reflects. Moving a reflector, diffusion frame or black flag can define that shape more directly than adding more light to the fixture. Check the arm, joints and base one by one to make sure they do not merge.
- The light on the set: The tabletop should show the direction and reach of the pool of light. If the whole surface is evenly filled, or one broad reflection becomes a bright distraction, it is harder to read where the lamp’s light lands. Decide how prominent that spill should be, then adjust the tabletop fill and reflections.
- The environment: The window only needs to establish the night setting. Bright points outside, reflections in the glass or other practical lights may attract attention before the product does. Check that they support the space while the lamp remains the visual center.
Warm light against a cool night is a choice, not a formula
A warm lamp against a cooler window can create color separation, but not if it shifts the product’s material or color away from how the brand needs it to look. First decide how the shade, metal and tabletop should render. Then let the window or environmental reflections describe the space. The warm tone in the concept image is a visual hypothesis, not a specification for a real lamp.
Test the final composition before the shoot
Put the actual fixture, final camera position, window view and action into the same test frame. Check four things: does the emitting surface keep its shape; can you read the fixture’s edges and material; does the tabletop highlight have direction and reach; do bright points in the background compete with the product? Change one factor at a time so you can tell which layer moved. Rather than relying only on overall exposure, return to the layer that needs work and adjust the light balance, reflected shapes or composition.
For an HDR delivery, ARRI’s HDR exposure guidance recommends using an HDR monitor on set to judge the relationship between background highlights and practical lights in frame. It also warns that clipped highlights can be distracting. This advice is specific to HDR workflows; monitoring should follow the master and delivery pipeline agreed for the project. See ARRI HDR FAQ for context.
The final test is not whether the frame got brighter. It is whether viewers can read the fixture, its light and the space around it. Give each a clear place in the still frame first; then add the switch-on, the hand movement and the camera move.
Production examples and next steps
Use the TVC brief to connect the selling point, performance and product presentation. The Red Devils × Tencent Games commercial is a finished-film reference.
Review TVC and commercial production and Red Devils × Tencent Games: A Passionate Competitive TVC for Young Players. To discuss your project, send the script, storyboard, required formats and approval dates through the English project enquiry form.